Published: Mar 11, 2024 by Kwantae Kim
Top
Open Source Chip Design
Getting Started
Install Open Source Tools
-
Integrating Jupyter Notebook in VS Code
- Setting Up Open Source Tools with Docker
- Seamless Host-Side Control of Docker
Try It Out
Initial version: Jul 4, 2021 (in Korean)
Verified with Windows
Verified with MacOS
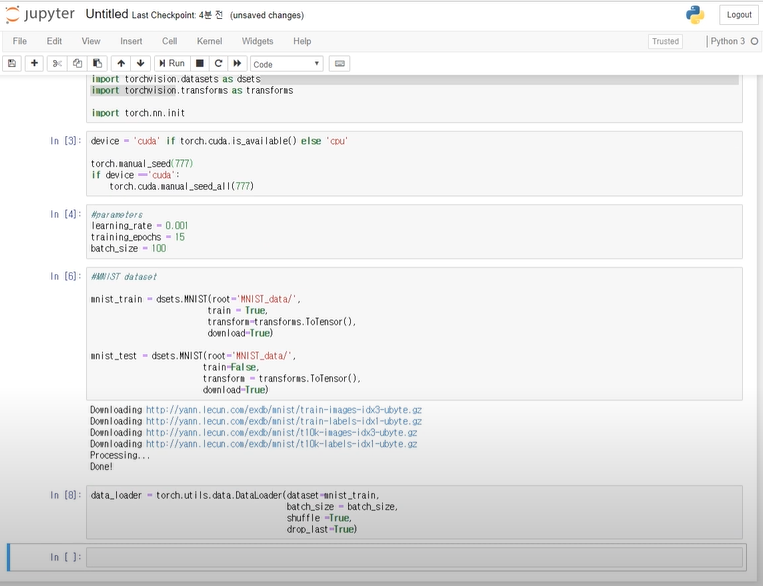
Many people use Jupyter Notebook these days as it is easily accessible for developing AI algorithms, like based on PyTorch framework. Jupyter Notebook looks like below. There are some sort of Python codes within each cells.
It you happen to see that one for the first time, it might feel interesting because it can run the code cell-by-cell.
Installing Anaconda
Navigate to Anaconda Webpage and install the Anaconda. Here, you do not need to install Python explicitly if you install the Anaconda (Python is included).
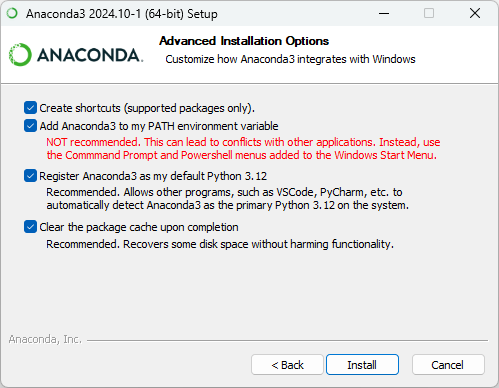
There is one thing you need to take extra care. If you proceed the installation of Anaconda like above, it asks you whether you are gonna Add my PATH. I was a bit scared of this Red Text and it seemed to be kind of warning so I did not mark on this checkbox at the very beginning.
But in the end it tortured me for making Anaconda compatible with VS code terminal .
So please mark this option as Enabled.
Setting Up Kernel in Anaconda
I thought like below at the first moment.
.. But what is kernel? Why do we set this up?
You will install this package and that package and so on, to run the Python script. These days, newer than 3.6 version of Python is widely used. But if you happend to use older versions of Python, you don’t want to uninstall Python environment and reinstall. Kernel works greatly in this case. You can build a virtual environment with old Python version and install relevant packages within that kernel only.
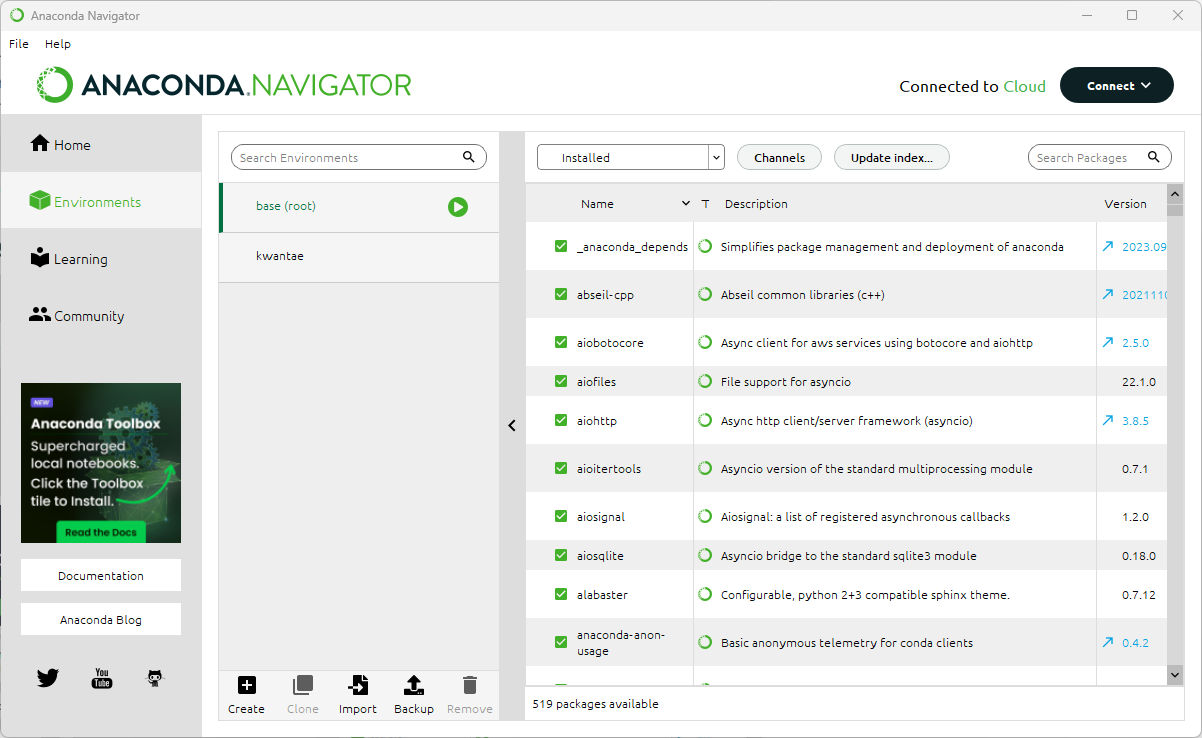
Start Anaconda Navigator and add a kernel in the Environments tab using Create button.
Installing Jupyter in a New Kernel
If you click your new kernel, you will see something is rotating and the button like play is positioned differently. Then as you click the play button, you will see several tabs as below. It will only show Open Terminal and Open with Python at the first time. Let’s make it show all the options.
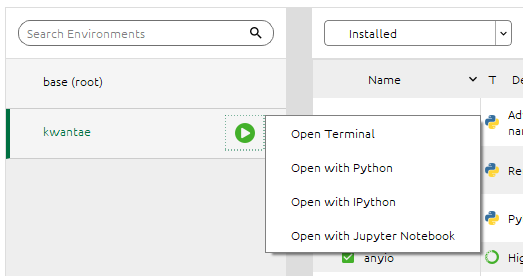
Click Open Terminal in Anaconda Navigator. A terminal will pop up. You should see your new kernel name on the right side of your terminal as below screenshot, for example study:
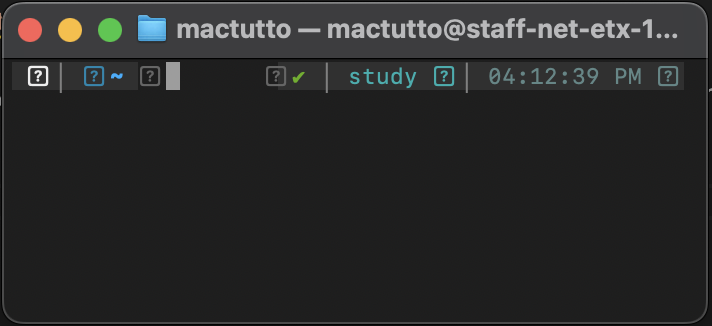
The text font is broken, but it doesn’t really matter and you can ignore it.
ipykernel (Jupyter was called ipy before) is needed to work on our kernel, later when we play with Jupyter Notebook. Even though we set up a new kernel as above, it was set up in Anaconda, not in Jupyter. Execute the below commands and install Jupyter and ipykernel.
$ pip install jupyter
$ pip install ipykernel
As a next step, execute the below command and let Jupyter know that we are gonna use your new kernel. Replace {Your Kernel} with your kernel name (without { and }). Here, -m means running package.
$ python -m ipykernel install --user --name {Your Kernel}
$ conda install jupyter
If integrating Anaconda with VS Code does not work correctly even at this point, further execute the following commands to make sure they are seamlessly integrated each other.
$ conda install ipykernel --update-deps
$ conda search python

# python=3.11.9 is working fine as of 24-Jun-2024
$ conda install python=3.11.9
Here, if you run search python then it shows a list of all the possible Python versions. As of 24-Jun-2024, python=3.11.9 is working fine with VS Code for Jupyter Notebook integration.
Even if there can be newer Python versions, I suggest using this version as an error can occur because of version conflict. You need to select the python version that is currently compatible with VS code. It keeps causing error otherwise as below:
kernel died with exit code 1
Configuring VS Code
I am familiar with using VS Code for editing. So I thought it would be wonderful to set up the environment Jupyter Notebook within the VS code. You can download VS Code in This Link.
- Go to
Extensionsand installJupyter(by Microsoft) andPythonin VS Code. - Open palette by
Ctrl + Shift + P(in Mac,⌘ + Shift + P) - Select
Python: Select Interpreter - You will find all available kernels. Select your kernel. Then you can work with the Python as we set up in our Anaconda kernel.
- (Optional for Windows) Open terminal by
Ctrl + `and set the terminal ascmd, notPowerShell
For makingcmdas default, open palette byCtrl + Shift + Pand useTerminal: Select Default Profile - Execute following command and check whether the terminal in the VS code shows your kernel name.
$ conda activate {Your Kernel}
Enjoy!
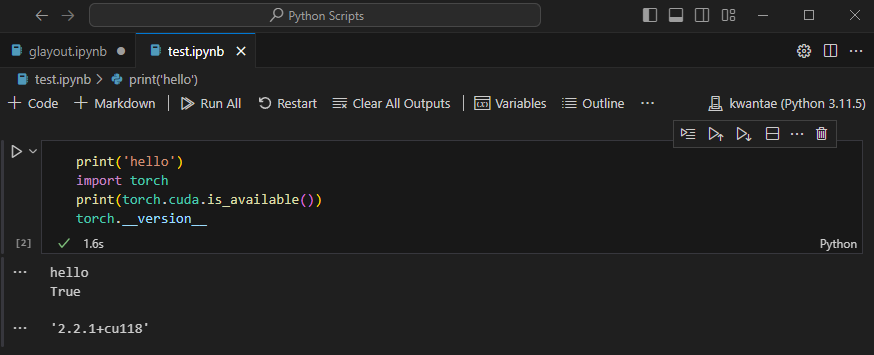
All set! Open palette and try Jupyter: Create New Blank Notebook.
